Hardly seems appropriate for today! But thankfully we only got 11 cms of the stuff so we fared a lot better than many along the eastern seaboard!
But what I really wanted to share with you today is an all white LO that I did last night. Everything ,except for the white vellum butterflies and the Dusty Attic hinge [ painted white of course!}, was created from plain white cardstock.
Earlier this summer, I stumbled across a fantastic paper artist by the name of Jeff Nishinaka. His work is phenomenal and you can check it out here. He works on quite a large scale using only white paper. Another artist I heard about just today is Elsa Mora. She also creates amazing work with mainly white paper and an exacto knife....except she does it on a much smaller scale! You can find her lovely work here.
Here's my work in white....
and here's a few close ups....
I absolutely love making my own flowers! I 'm amazed at how much plain old paper can be manipulated into various shapes. I've added a simple tutorial to show you how I made the two main flowers in this LO.
Here's what you'll need :
white cardstock
embossing folders of choice{I used Textile and Swiss dot}
retro flower punches small and medium size
2" and 1.5" round punches
Stickles { Star Dust}
Fabric tac { or glue of choice}
bamboo skewer/paint brush handle
leaf stamp
watermark ink and clear emboss powder
self adhesive pearls
For the sake of brevity, I've already stamped and embossed my leaf pattern onto cs, and also ran a few pieces through my Cuttlebug inTextile and Swiss Dot. I'm going to try and give directions for the two different size flowers a the same time....hope I don't confuse you!
Punch two med retro flowers and one small retro flower from the swiss dot cs.
Punch a 2"circle and one 1.5" circle from the textile cs. On the BACK of the punched circles , lightly draw five lines as shown. these will be your cut lines. Don't fret about being too perfect...it really doesn't need to be!
I tend to "cut off' the corners of the petals of the larger flower and sometimes take little snips along the top edges of the individual petals. Using the bamboo stick, I gentle curl the petals around it to "shape" my flower. The 2" circle above shows the layer that has been curled and the 1.5" hasn't been shaped yet.
On the smaller swiss dot flower, I curl the petals downward on the bottom layer and upwards on the middle layer { both punched with the medium retro punch]. I usually just use the flat end of the bamboo stick to press in the center of the smallest retro flower as I cup it in my hand. Some people spritz their pieces with water before shaping...I didn't on these as I felt they curled just fine without it. However I do recommend it for really thick papers. Of course you will need to air dry or use a heat gun on these layers if you choose to spritz.
Next , glue your layers together, making sure to stagger your petals. Finish with a pearl in the center of each flower. Paint tips of flowers with Stickles if desired...then assemble your leaves and flowers in an arrangement that is pleasing to you.
Just a couple more quick comments about my white Lo. The title was cut with "Storybook" cart on my Cricut. I wanted it to have dimension too, so I cut the words five times and then glued each layer together before painting it with a layer of Star Dust Stickles for a bit of pretty shimmer. This photo of me and DH was taken two weeks ago...it has nothing to do with weddings, or Valentine's day etc{ altho this WOULD make a gorgeous wedding Lo wouldn't it?} It was just a fav pic of the two of us and I wanted a mushy LO of me and my DH...still love him soooooo much after 23 years together!
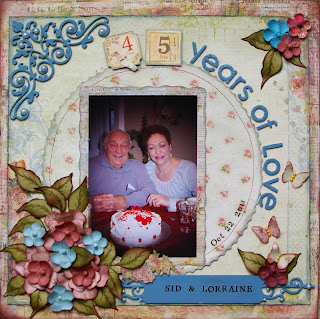
And speaking of long term love...I'll finish this post with a LO of my mom and Dad who celebrated their 45th wedding anniversary last weekend while visiting us here in Corner Brook.
Thanks Mom and Dad for setting such a wonderful example! Love you!
Thanks for stopping by. Have a great week...Toodles!


Wow, Michelle! Simply stunning layout!! And amazing tutorials...wonderful photos of everything! Thanks for sharing :) Looks like you're carrying on the tradition of a lasting loving marriage, just like your parents. Beautiful layouts and beautiful love stories!
ReplyDeleteWow two gorgeous layouts Michelle love the all white one and your flowers are amazing . Thanks for the tip on embossing the paper for flowers .Just wondering what edge punch you used for the border in the white LO ?
ReplyDeleteMarilyn
Gorgeous photos and layouts. It is so rewarding to see the celebration of two strong marriages. The white layout is stunning - the absence of colour really makes the details of the flowers pop!
ReplyDelete